Views: 2
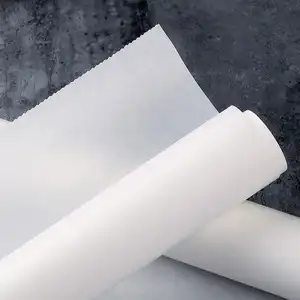
Silicone release paper is a versatile tool that finds its place in kitchens, craft rooms, and workshops alike. Coated with a thin layer of silicone, this paper provides a non-stick surface that prevents materials from adhering to it. Whether you’re baking delicate pastries, protecting adhesive surfaces in your crafts, or creating custom labels, silicone release paper can make your tasks easier and more efficient.
| Use | Description |
|---|---|
| Baking | Lining baking sheets to prevent sticking |
| Crafting | Protecting adhesive surfaces in projects |
| Labeling | Serving as a backing for stickers and labels |
| Art | Using as a disposable palette or in mixed media |
| Candy Making | Lining molds or trays for easy release |

1. Baking with Silicone Release Paper
Silicone release paper is a baker’s best friend when it comes to preventing cookies, pastries, and other baked goods from sticking to the baking sheet. Imagine pulling a batch of perfectly golden cookies from the oven, each one sliding off with ease—no more broken edges or stuck-on bits! Here’s how to use it:
- Preheat your oven according to your recipe’s instructions.
- Cut the paper to fit the size of your baking sheet using scissors.
- Place the paper on the baking sheet with the silicone-coated side facing up (this is the side that contacts your food).
- Arrange your dough or batter on the paper, spacing them as needed.
- Bake as per your recipe’s time and temperature guidelines.
- Remove the baking sheet from the oven and let it cool for a few minutes.
- Gently lift the baked goods off the paper—they should release easily.
- Reuse or dispose of the paper. If it’s still in good condition, wipe it clean with a damp cloth for future use.
Tip: Ensure the silicone side is up to maximize its non-stick properties.
2. Using Silicone Release Paper in Crafting
In crafting, silicone release paper is invaluable for protecting adhesive surfaces until you’re ready to use them. Whether you’re creating custom stickers for your planner or safeguarding a delicate die-cut, this paper keeps your projects pristine. Here’s how to use it:
- Prepare your project by ensuring all adhesive surfaces are clean and dust-free.
- Cut the paper to cover the adhesive area completely.
- Apply the paper over the adhesive, pressing gently to secure it temporarily.
- Store or transport your project as needed, with the adhesive protected.
- When ready to use, peel off the silicone release paper to expose the adhesive.
- Apply your project to the desired surface, pressing firmly.
Tip: Store protected projects in a cool, dry place to preserve adhesive quality.
To help you choose between silicone release paper and similar products, here’s a comparison:
| Feature | Silicone Release Paper | Parchment Paper | Wax Paper |
|---|---|---|---|
| Non-stick | Yes | Yes | Yes |
| Heat Resistance | Up to 450°F (232°C) | Up to 420°F (216°C) | Not heat-safe |
| Reusability | Yes | Limited | No |
| Common Uses | Baking, crafting, labeling | Baking | Food wrapping |
3. Creating Labels with Silicone Release Paper
Silicone release paper is essential for producing and applying labels and stickers, keeping the adhesive intact until you’re ready to use them. Follow these steps:
- Design and print your labels on adhesive-backed material.
- Attach the labels to the silicone release paper, with the adhesive side against the paper.
- Cut or trim the labels as needed, keeping them on the paper for protection.
- When ready to apply, peel the label off the silicone release paper.
- Stick the label onto the intended surface, smoothing out any bubbles.
Tip: Leave labels on the paper until needed to prevent the adhesive from drying out.
4. Using Silicone Release Paper in Art Projects
Artists can use silicone release paper as a convenient, disposable palette for paints, taking advantage of its non-stick surface. Here’s how:
- Squeeze your paints onto the silicone release paper.
- Mix colors directly on the paper as needed.
- Use brushes or tools to pick up the paint and apply it to your canvas.
- After your session, dispose of the paper for easy cleanup, or let the paint dry and peel it off for reuse.
Tip: For mixed media, use it as a temporary backing for gluing elements—it peels off easily once dry.
5. Candy Making with Silicone Release Paper
When making candies or chocolates, silicone release paper ensures your treats don’t stick to molds or trays, simplifying the process. Here’s how to use it:
- Prepare your candy mixture according to your recipe.
- Line your molds or trays with silicone release paper, silicone side up.
- Pour or place the candy mixture onto the paper.
- Let it set or cool as required.
- Once set, lift the candies off the paper—they should release effortlessly.
- Reuse the paper if it’s still clean.
Tip: For delicate chocolates, chill the tray with the paper before pouring to aid setting.

General Tips for Using Silicone Release Paper
To maximize the effectiveness of silicone release paper, consider these tips:
Safety: Check the paper’s temperature limit (usually up to 450°F or 232°C) before use.
Handling: Avoid touching the silicone side with your fingers to prevent oil transfer.
Storage: Keep it in a cool, dry place to maintain its properties.
Reusability: In baking and candy making, it’s often reusable—wipe it clean and dry it. For crafting or labeling, it’s typically single-use.
Cutting: Use sharp scissors or a craft knife for clean cuts.
We are a leading manufacturer of high-quality silicone release paper, specializing in products that offer excellent non-stick properties for various applications. Our silicone release paper is widely used in industries such as baking, crafting, and manufacturing, providing a reliable solution for professionals and businesses alike. We warmly invite you to contact us for more details about our products or to explore how we can support your specific needs. Our friendly team is here to assist you!